How to Create a Sitemap.xml for Magento 1.x
Enable sitemap.xml in Magento
Configure Magento to Create Sitemaps
To enable sitemaps inside Magento, log in to your admin
Make sure your crontab is working properly
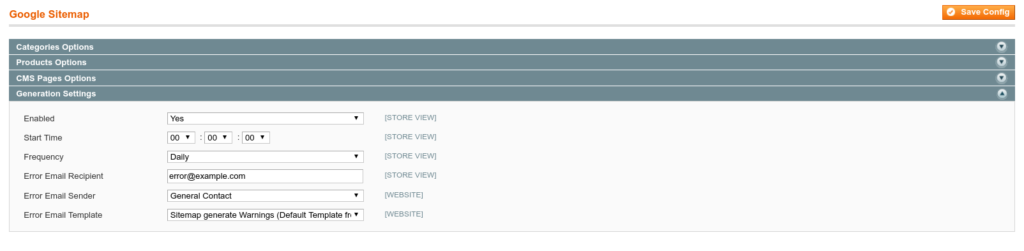
Navigate to
System>Configuration>Catalog>Google Sitemap>Generation Settings
Now fill in the information:
Create a sitemap.xml in Magento
When the generation of sitemaps is enabled in the catalog settings, we should make sure a sitemap.xml is created.
Navigate to
Catalog>Google Sitemap>Add SitemapAdd a sitemap.xml file to the configuration:
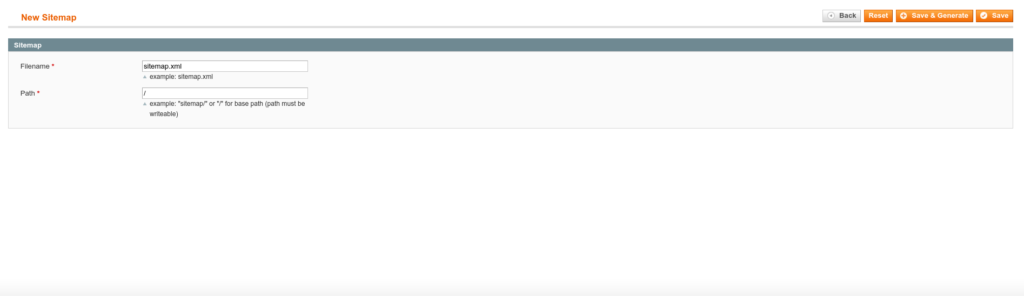
If you use only one sitemap for all storefronts, just use / as path. If you want to use multiple sitemap.xml files depending on your storefront create a sitemap directory in /data/web/public, a directory named after each storefront to save each sitemap.xml on a different location.
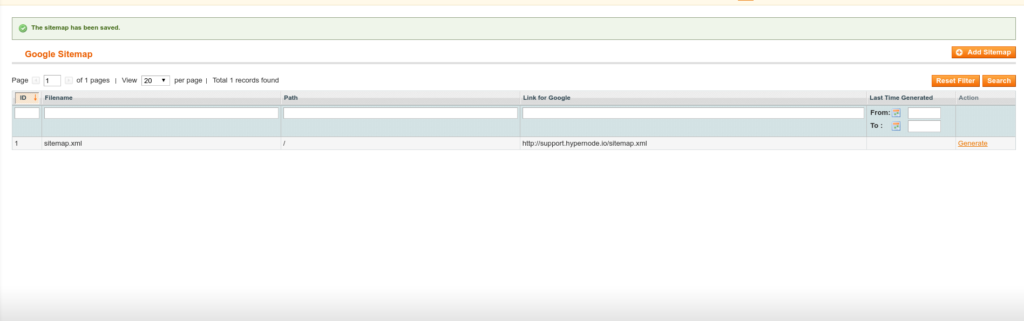
Generate the Sitemap Manually
After adding a sitemap to the Magento configuration, we’ll make sure the sitemap exists by clicking the generate button on the far right of the page:
Configure Nginx to Use the Same Sitemap for All Storefronts
There is no additional configuration needed for Nginx when you use one sitemap for all storefronts. As there is only one sitemap.xml, Google and other search engines, will use the same sitemap for all sites.
Configure Nginx to Use a Sitemap.xml per Storefront
When you want to use a different sitemap per storefront some additional configuration will be required:
Make sure there is no sitemap in
/data/web/public/sitemap.xmlto avoid an incorrect sitemap to be served (change the location of the sitemap.xml in Magento from/sitemap.xmlto/sitemaps/$storecode/sitemap.xmlwhere$storecodeis the name of your storefront)Create a sitemap directory and a directory for your storefront:
for CODE in $(n98-magerun sys:store:list --format csv | sed 1d | cut -d "," -f 2 ); do
  mkdir -p /data/web/public/sitemaps/$CODE
done
Create an Nginx include as
/data/web/nginx/server.sitemapto route all requests to sitemap.xml to the given store:location /sitemap.xml { rewrite ^/sitemap\.xml$ /sitemaps/$storecode/sitemap.xml; }
Now test your sitemap by requesting and verify whether the right sitemap is served:
curl -v https://www.example.com/sitemap.xml
Alternative Configurations
Configure Nginx to Serve a Sitemap.xml Outside the Public Directory
In case the sitemap.xml is created outside the public webroot (/data/web/public/), you can’t use a rewrite construction to serve your sitemap as the file is not public accessible. To circumvent this, you can use the Nginx alias feature to create an alias to a file outside the public webroot:
location /sitemap.xml {
    alias /data/web/magento/sitemap.xml;
}
Configure Sitemaps When Storecode to URL is Enabled
Use the following configuration if storecode to URL is enabled in your webshop and no $storecode variable is set:
location ~ .+/sitemap.xml {
    rewrite ^/([^/]+)/sitemap\.xml$ /sitemaps/$1/sitemap.xml;
}
Add Your Sitemap Location to Your Robots.txt
When you can successfully request your sitemap.xml, add it to your robots.txt:
Sitemap: http://www.example.com/sitemap.xml
Troubleshooting
We’ve seen one or two special cases where creating a sitemap was extremely slow. This was caused by some queries that sometimes took 10 minutes (!) to complete. In this very specific case the solution was to enable use_index_extensions in mysql. To do this, add SET SESSION optimizer_switch='use_index_extensions=on' to the mysql initStatements in your local.xml:
<connection>
    <host><![CDATA[mysqlmaster]]></host>
     <username><![CDATA[app]]></username>
     <password><![CDATA[somepass]]></password>
     <dbname><![CDATA[magento_db]]></dbname>
     <initStatements><![CDATA[SET NAMES utf8; SET SESSION optimizer_switch='use_index_extensions=on';]]><initStatements>
     <model><![CDATA[mysql4]]></model>
     <type><![CDATA[pdo_mysql]]></type>
     <pdoType><![CDATA[]]></pdoType>
     <active>1</active>
 </connection>