How to Use SSH Keys on Hypernode
This tutorial shows how to create a keypair and use PuTTY (for Windows users) or Terminal (Linux and Mac OSX) to log in to your Hypernode.
For Windows Users (PuTTY)
To generate an SSH keypair and connect to your Hypernode, you’ll need to use three different programs; PuTTY, PuTTYgen and Pageant. Download these programs from the PuTTY website. Follow the next steps.
Generate the Keypair With PuTTYgen
Open PuTTYgen.
Change the bits to 4096 in the Number of bits in a generated key field.
Click Generate and move your mouse randomly.

Copy the key in the upper field (this is your public key) and save it somewhere.
Enter a name for the key in the Key comment field.
Enter a password in the Key passphrase and Confirm passphrase fields.
Click Save private key.
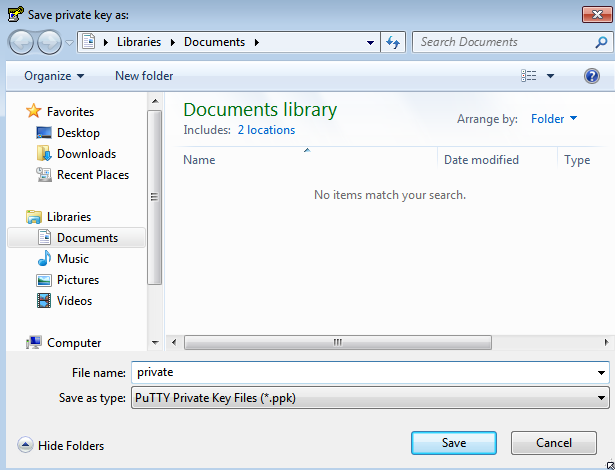
Close PuTTYgen.
Add Public Key to Your Hypernode
After you have created a key pair, make sure you add your public key to your Hypernode. You can do it using Control Panel or using terminal (SSH).
Option 1: Add Public Key via Control Panel
Log in to the Control Panel.
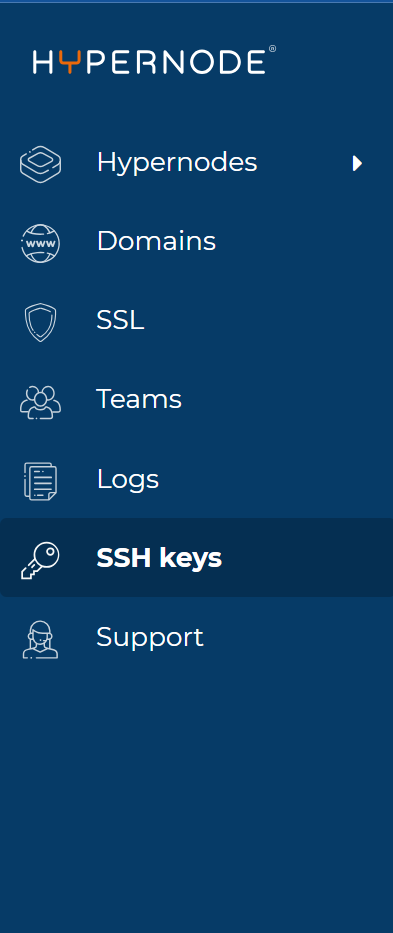
From the left navigation, select SSH keys page.
You can add a new key on this page by clicking the Add SSH key button.
On the next page, paste the content of your public key into the public key field and give your SSH key a name:
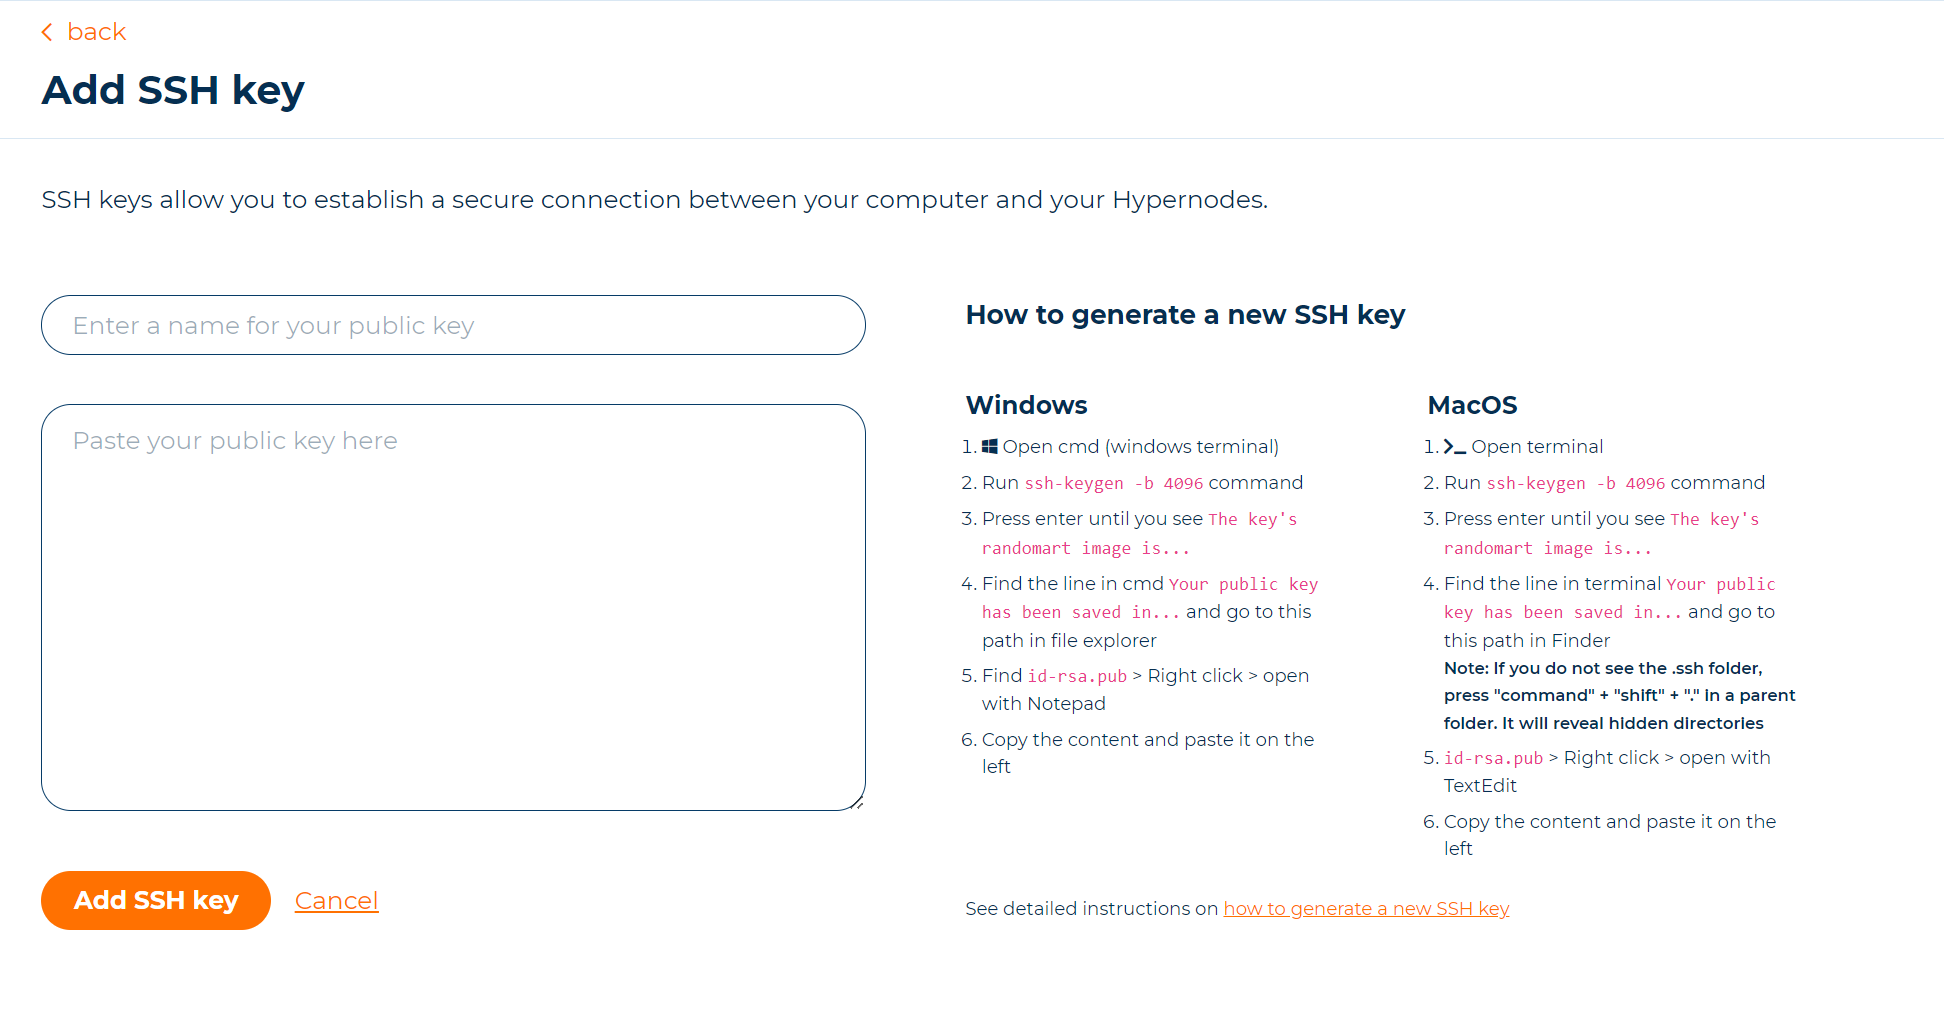
Click Add SSH key to add the key to the Hypernode.
Repeat the above steps if you would like to add more keys.
A couple of things to keep in mind:
– In the SSH keys page in the Control Panel you will see an overview of all Hypernodes you have access to with associated SSH keys (both yours and other members’).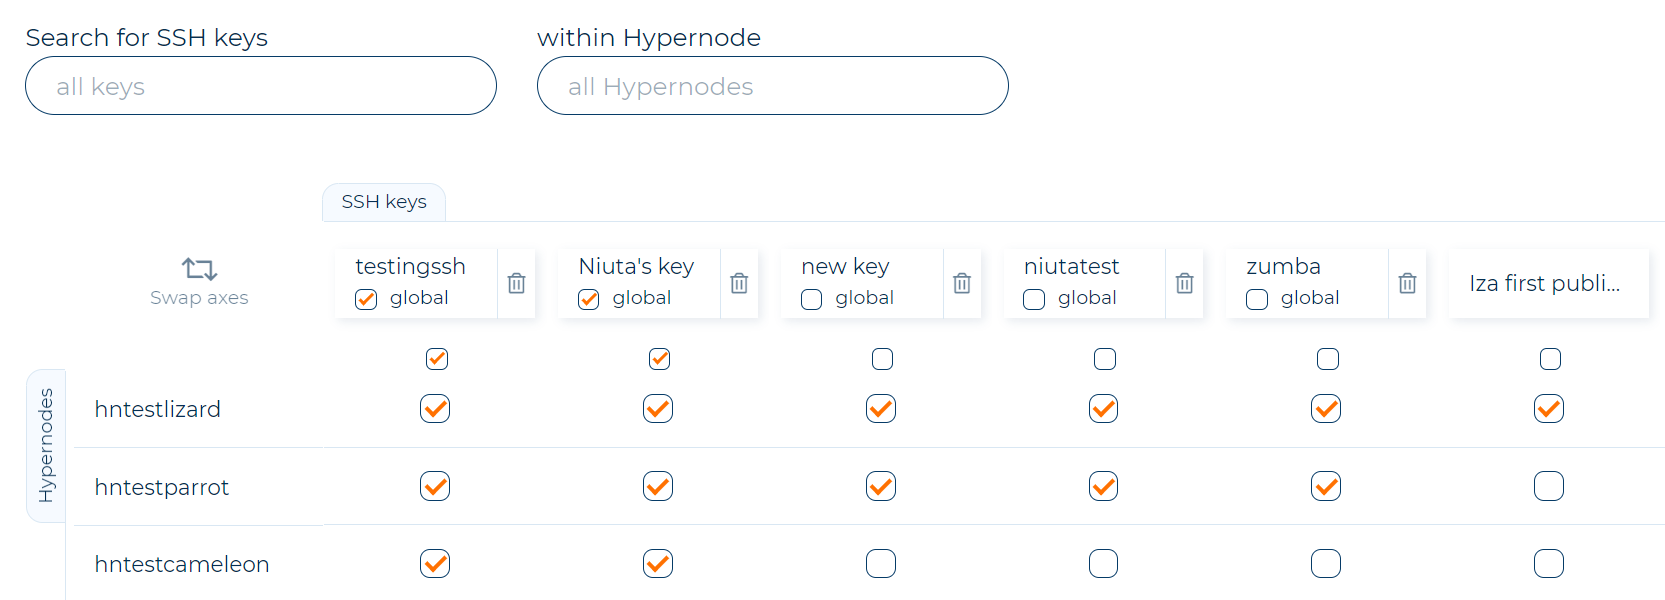
– All SSH keys added by you are automatically added to Hypernodes you have access to. If you want to turn it off, uncheck global option.
– The following SSH public key types in the Control Panel are supported: RSA keys >= 2048 bits, ECDSA and Ed25519 keys.
– DSA and RSA keys < 2048 bits are not permitted because they are not secure.
– You will be prompted with a clear message if there is a problem with your key.
Limiting an SSH key to specific IP addresses
It’s possible to restrict remote SSH logins to a single IP address when adding an SSH Key to your Hypernode. To enable this feature, simply add the ssh key options prefix from=”X.X.X.X” to your public key at the start of your public key. For example, to limit logins to IP address 1.2.3.4, you would use the following prefix on your SSH key:
from=”1.2.3.4″ ssh-ed25519 AAAA….
The IP address can be specified as a range such as from=”1.2.3.0/24″ or as a comma separated list of IP addresses such as from=”1.2.3.4,1.2.3.5″.
More information about this feature can be found in the OpenSSH documentation.
Option 2: Add Public Key via SSH
If you want to add SSH users you can also edit the ~/.ssh/authorized_keys file.
Log in to your Hypernode
Go to the
~/.ssh/authorized_keysfileEdit this file by adding extra public key(s) to this folder
Save the file
Add Private Key to Pageant
Open Pageant
Click Add Key
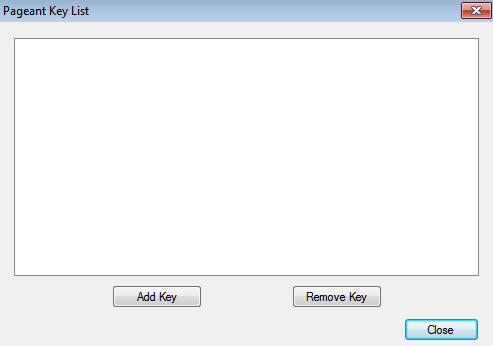
Select your private key and click Open.
Insert your password and click Ok.
Your private key is now saved into Pageant
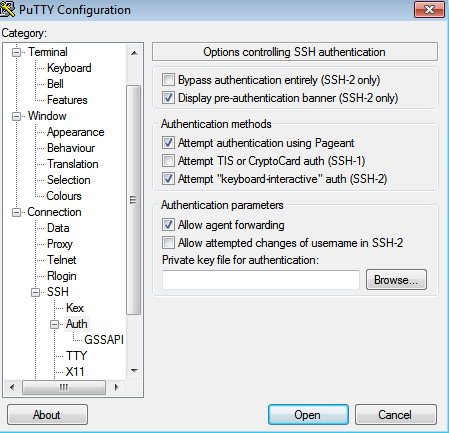
Enable Agent Forwarding in PuTTY
Open PuTTY
Navigate to Connection → SSH → Auth
Enable Allow agent forwarding
Connect to Hypernode Using PuTTY
To finally connect to Hypernode you’ll have to use your SSH hostname and username.
You will find your SSH hostname and username in the email in which we inform your Hypernode is ready for use (after buying and provisioning Hypernode).
Use the following steps to connect to Hypernode.
Go back to PuTTY
Go to Session and enter your hostname in the Host name (or IP address). This should be the name of your Hypernode plan, like example.hypernode.io
Click Open
Enter app as your username
Test if you can connect to your agent: ssh-add -L
Congrats! You can now access your Hypernode
For Linux and Mac OSX Users (Terminal)
Generate an SSH Keypair
The first step is to generate a keypair. You can do this by using the next bash command ssh-keygen -b 4096 on your desktop.
You’ll get the following output:
app@abcdef-example-magweb-cmbl:~$ ssh-keygen -b 4096
Generating public/private rsa key pair.
Enter file in which to save the key (/Users/username/.ssh/id_rsa):
Enter passphrase (empty for no passphrase):
Enter same passphrase again:
Your identification has been saved in /Users/username/.ssh/id_rsa.
Your public key has been saved in /Users/username/.ssh/id_rsa.pub.
This command will ask you to give the files a name. Name it whatever you like or keep default and enter a passphrase. Two files will now be created; id_rsa and id_rsa.pub (unless you gave it a different name). The file id_rsa is your private key and the file id_rsa.pub is your public key.
Place the Files in Your .ssh Folder
When generating the keypair the files will be placed in the exact folder from where you ran the ssh-keygen command. We recommend that you move these files to the .ssh folder on your desktop. This folder was created instantly when you used the ssh-keygen command. You can use the mv command to move the files to their new location. (for example mv /path/to/id_rsa /path/to/id_rsa.pub ~/.ssh/)
Enable Key Forwarding
The next part is to create a config file in which you enable forwarding. You can use this command (make sure you are in the .ssh folder):
editor config
Put in the next information:
Host *
ForwardAgent yes
This will make sure you can use your ForwardAgent
Use an SSH-agent
When using an SSH keypair it’s recommended you use an ssh-agent to store your keypair credentials. By doing this you can connect to your Hypernode and from there connect to a different machine. This works because of your ssh-agent. It stores your SSH session, and therefore you can use this to connect to different machines on the fly. Add your key to your agent by using the next command:
ssh-add ~/.ssh/id_rsa
You can check if your key is really in your agent by using the following command:
ssh-add -L
Add Public Key to Your Hypernode
After you have created a key pair, make sure you add your public key to your Hypernode. You can do it using Control Panel or using terminal (SSH).
Option 1: Add Public Key via Your Control Panel
Log in to the Control Panel.
From the left navigation, select SSH keys page.
You can add a new key on this page by clicking the Add SSH key button.
On the next page, paste the content of your public key into the public key field and give your SSH key a name:
Click Add SSH key to add the key to the Hypernode.
Repeat the above steps if you would like to add more keys.
A couple of things to keep in mind:
– In the SSH keys page in the Control Panel you will see an overview of all Hypernodes you have access to with associated SSH keys (both yours and other members’).
– All SSH keys added by you are automatically added to Hypernodes you have access to. If you want to turn it off, uncheck global option.
– The following SSH public key types in the Control Panel are supported: RSA keys >= 2048 bits, ECDSA and Ed25519 keys.
– DSA and RSA keys < 2048 bits are not permitted because they are not secure.
– You will be prompted with a clear message if there is a problem with your key.
Limiting an SSH key to specific IP addresses
It’s possible to restrict remote SSH logins to a single IP address when adding an SSH Key to your Hypernode. To enable this feature, simply add the ssh key options prefix from=”X.X.X.X” to your public key at the start of your public key. For example, to limit logins to IP address 1.2.3.4, you would use the following prefix on your SSH key:
from=”1.2.3.4″ ssh-ed25519 AAAA….
The IP address can be specified as a range such as from=”1.2.3.0/24″ or as a comma separated list of IP addresses such as from=”1.2.3.4,1.2.3.5″.
More information about this feature can be found in the OpenSSH documentation.
Option 2: Add Public Key via SSH
If you want to add SSH users you can also edit the ~/.ssh/authorized_keys file.
Log in to your Hypernode
Go to the
~/.ssh/authorized_keysfileEdit this file by adding extra public key(s) to this folder
Save the file
Connect to Your Hypernode
After doing this you can use the following command to connect to Hypernode:
ssh app@myname.hypernode.io