How to Enable PageSpeed Booster
PageSpeed Booster is a reverse proxy that acts like a filter in front of your website, similar to Varnish. On pages that can be cached, it uses many static optimisation techniques to greatly increase the page speed score and performance of your website.
This article will explain how to enable PageSpeed Booster on your Hypernode account.
Requirements
To get started with the PageSpeed Booster (formerly known as Percolate), you must meet the following requirements:
A production environment that is hosted on Hypernode.
A development environment hosted on Hypernode containing a copy/mirror of the production site.
Varnish enabled on both the production and development environment.
Time to thoroughly test the environment with the PageSpeed Booster enabled.
The PageSpeed Booster implemented on your development environment according to these steps listed in our documentation.
Step 1: Getting started
Step 1.1: Activation of the PageSpeed Booster
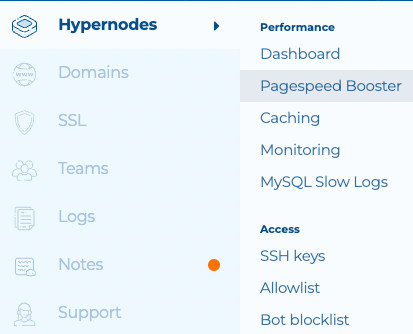
From the main page on your Control Panel account go to the “PageSpeed Booster” page under “Performance” by clicking on “Hypernodes” top left corner of your screen.
On the next page you are able to select which Hypernode Development plan you want to enable the PageSpeed Booster on. When PSB is working correctly on the Development Plan you apply these same steps to your Production plan. On this page you can add one or multiple domains for which PSB will be enabled on. Note that both the www.example.com and the non www. domain example.com must be added. We highly recommend doing extensive testing on a subdomain first before running PSB on your live webshop and domains. For example the subdomain psb.example.com
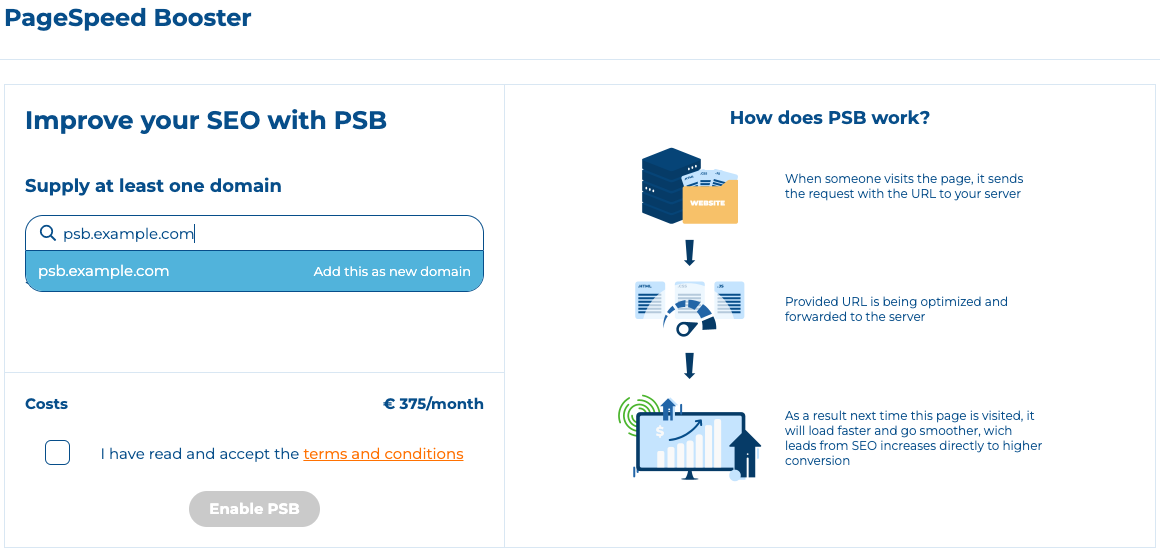
After adding your domain(s) and accepting the terms and conditions, your PageSpeed Booster will be booted in about a minute or two.
Step 1.2: The PageSpeed Booster on the Control Panel
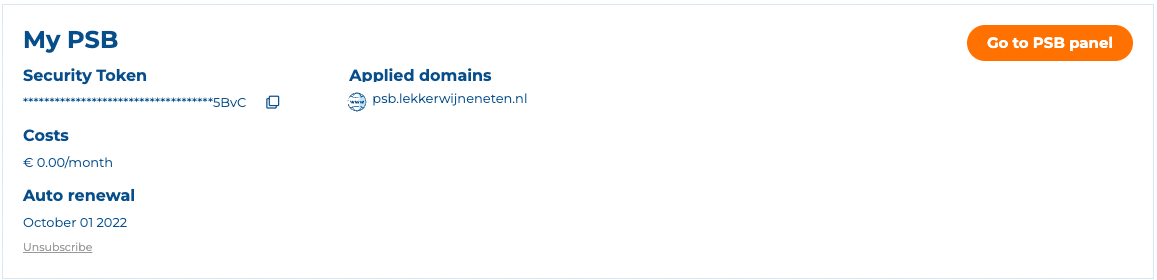
When PSB is activated your PageSpeed Booster view on the Control Panel will be changed. This will now show you on which domains PSB is applied, the renewal date, costs, as well as the Security Token. This token can be used for login on your own PSB panel. In the top of your screen you can see the PSB CNAME record. This is where you PSB applied domains should point to. This records will look something like this:
“appname-appname.fsn1.percolate-3.hipex.cloud”
Step 1.3: The PageSpeed Booster panel
The next step is to go to your own PSB panel. You can use the orange button to go there or visit your test domain, for example with our test subdomain: https://psb.example.com/.percolate/status/ Here you will be asked to use your Security Token to get access to the PSB environment.
Step 2: The PSB panel
The PSB panel provides all sorts of information and settings about your PageSpeed Booster. We advise the following recommend settings for new users. Go to “Settings” in the top of your screen and change these accordingly:
Step 2.1: Recommended PSB settings
For the live webshop URL the setting Site map only under “General” can be turned to True:

For **staging.example.com**this settings can be turned to False.
The setting Purge mode under “General” can be turned to DELAYED_BOT:

The setting OPTIMIZED_DIFER_ENABLED under “Javascript ” can be turned to FALSE:

The setting OPTIMIZE_CSS_COMBINE_ENABLED under “CSS ” can be turned to FALSE:

If you are curious what a specific setting does or means, you can click on the ibutton for additional information.
Step 2.2: Additional recommend settings
When your webshop has a good sitemap it can be loaded into PageSpeed Booster. This can be done under the settings “General” Sitemaps:

Take note that Cloudflare RocketLoader is not supported by PageSpeed Booster and therefore should be disabled.
Step 3: Implementation of the PageSpeed Booster
After following the above steps, it is now time to set up the necessary Hypernode server configuration for the PageSpeed Booster. These steps are written in our article How to Implement PageSpeed Booster. It is recommended to implement and use PSB first on your Development Hypernode and subdomain setup for PSB testing.
The steps include:
Configuring PageSpeed Booster on your Development Environment
Configure SSL and DNS
Configuring Varnish
Modifying your Varnish VCL configuration
Add the user agent PSBto the allowlist for the ratelimiter in
~/nginx/http.ratelimitfileTurn off ESI Block Parsing
Add PageSpeed Booster as Flush Target
Step 4: Testing of PageSpeed Booster
Step 4.1: Run PSB and monitor the queue
Go to the PSB panel and open your queue, for our example it is this URL https://psb.example.com/.percolate/status/queue. For the Development Hypernode there is 1 available worker for the web page optimization. For the Production Hypernode there are 4 workers. The optimization queue will run when pages are visited or when you scan the available sitemap(s). The button is in the top left of your PSB panel:

Step 4.2: Reading out the PSB queue
When the PageSpeed booster tries to optimize your webshop, there are three different situations:
Optimized The page is optimized by the PageSpeed Booster.
Failed-retry The page could not be optimized by the PageSpeed Booster, but you can run a retry.
Failed Because of an error within the page, the PageSpeed booster could not optimize the page. The most common cause for this failed optimization is a parseerror.
Step 5: Troubleshooting PSB
Keep in mind that PageSpeed Booster is a complex tool that require a lot of testing before it can be pushed to the live site. For example, it is possible that your site has errors in the HTML/CSS code. The PageSpeed Booster will find these errors, and they have to be fixed for the PageSpeed Booster to work correctly. We have created a separate documentation article were we will list some of the more common errors we have seen and how to fix them.